Hello dear forum,
I want to contribute this time.... this post describes how to remove the Blower Motor Assembly and the Heater Core Box for a 1966 Pontiac Lemans. This was done to prepare for the installation of a new A/C system from Vintage Air.
Blower Motor Assembly removal:
1, The blower motor assembly is that big contraption on the passenger side engine firewall.
2. On mine, there were 3 wiring harnesses to disconnect. One was a 5-wire harness located on top of the blower motor, the second one was a single wire harness located on the bottom of the blower motor and the third wiring harness connector will under the dashboard be for the wires coming out from inside the cabln out through the firewall going to the master relay.
3. Carefully guide the wires out of the way.
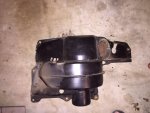
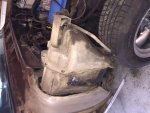
4. I counted 9 holes on the blower motor assembly. The unit is fastened to the engine firewall with special "flimsy" thin metal nuts because the unit is really held in place by the sealant or gasket t the firewall.
Here are pics:View attachment 3219View attachment 3220
5. There are 3 holes on the lower half of the blower motor assembly. First inspect if the leftmost hold has a nut there. If it does, this is when it is necessary to loosen or remove the inner wheel well to gain access to the nut. Like I read in other posts, if you are lucky and the blower was replaced in the past, the installer would not have bothered putting a nut on that hole because the remaining fasteners hold the assembly securely in place.
6. Remove all the fasteners securing the blower assembly to the firewall. Once all nuts are removed, use a prying tool to lift the assembly away from the firewall.
Heater box removal:
The heater box is that big black contraption on the passenger side under the dashboard.
1. Remove all ducting/duct work coming out of the heater box to expose the heater box.
2. See pics View attachment 3221
3. Remove the wiring harness attached to the heater box, the 3 rubber vaccum hoses and the 2 cable links from the temperature controls to the box. Label as needed.
4. The heater box is attached to the firewall by 4 bolts attached to the box.
5. Take a rubber mallet and tap the bolts gently towards the direction of inside the cabin to loosen the heater box since it will be stuck to the firewall via gasket and sealant.
6. Carefully guide the heater box out of the car.
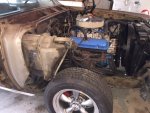
Now here's a question: I found two refrigerant metal tubes located right under the passenger side hood hinge and it appears they come down to a condenser or small radiator apparatus located inside the passenger kick panel. See pics below.
View attachment 3223 View attachment 3222
I am still trying to figure out what this is for since could not find in the service manual or maybe a mod. Not sure.
Hope this post helps someone who is removing their blower motor assembly and heater core box.
Thanks


