Please consider whitelisting my site in your ad blocker. If you must keep it running here, please support this endeavor and select a support plan - which starts at only $0.16 cents per day. I'm not asking for much. I just need a little help. Thank you. Click here to select a support plan.

You are using an out of date browser. It may not display this or other websites correctly.
You should upgrade or use an alternative browser.
You should upgrade or use an alternative browser.
Our 1st "Blu" LeMans Build
- Thread starter Lemans71sport
- Start date
Lemans71sport
New member
Great job!! Thanks for sharing all of this, great idea!
Thanks Jf....I hope you don't get tired of seeing the progress! Can hardly wait to show some of the pretty parts...getting the underside done, brakes on, etc...

I am being very positive the 71 will look every bit as good as the 68 Camaro did. I have posted a few from it's underside....
")
Kurt L71S
Attachments

Last edited:
Lemans71sport
New member
any intent to change the rear end ratio?
do you know what is in it now?
Right now...Don't think so..no need..The engine is sooooo stock....I have yet to do the config on the ratio....be nice for a change to have a ride that gets SOME mileage...

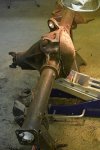
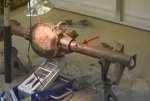
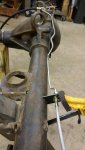
Thanks for the reminder Mel...I will be getting that ratio real soon...One thing I did find is on the passenger side tube of the rear end, there is a hole in the tube...is this for a vent valve...come to think about it, my 68 Camaro did not have one, OR I looked right past it...will need to check that out!!..

Kurt L71S
______________________________
Lemans71sport
New member
I thought the vent was on the center section of the rear
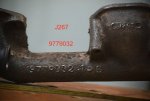
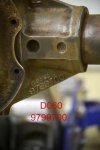
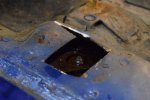
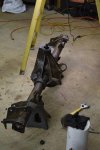
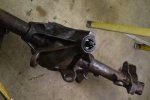
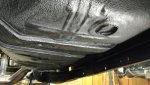
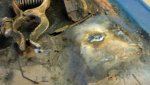
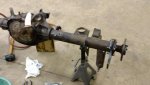
I spent the afternoon cleaning and wire brushing the rear end from end to end. I have posted a few photos of the numbers, but did NOT find any numbers on the axle tubes on either side...any ideas?...

Also have a photo of the vent hole for the vent valve...check it out. It is on the passenger side tube...
")
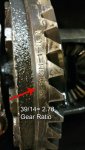
I'll be taking the cover off and counting teeth...
Kurt L71S
Attachments
Lemans71sport
New member
from a book i have "a two letter axle code is stamped on the front passenger side of the axle tube".
Mel, I will examine the tubes again....I can't believe I could not find them....I'll check it out...
Is that all that is stamped is just a 2 letter code and no numbers? If so, I can now see how I missed them....they can hide, but not forever...
Thanks for the info..
Kurt L71S
______________________________
Lemans71sport
New member
correct no numbers, 2 letters
No can find!! Oh well!! Thanks Mel!!...
Kurt L71S
- Joined
- Dec 8, 2008
- Messages
- 25,816
- Reaction score
- 704
- Points
- 113
it's about 3" from the carrier on front of passenger side axle tube
http://www.wallaceracing.com/axledata2.htm
http://www.wallaceracing.com/axledata2.htm
Lemans71sport
New member
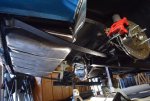
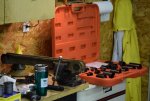
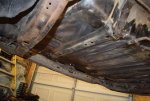
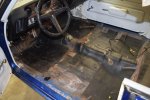
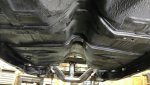
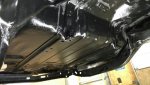
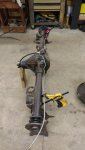
Worked the underside of the 71. used the grinder with the wire brush....Man, it was dirty. But it is getting there...little by little...
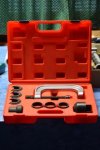
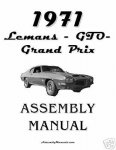
I also ordered a couple of tools to help with the rebuild....and an assembly manual...
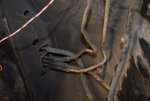
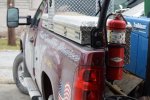
Some of the photos are of the gaggle of fuel lines just north of the tank....most are vapor lines to and from...
Kurt L71S
I also ordered a couple of tools to help with the rebuild....and an assembly manual...
Some of the photos are of the gaggle of fuel lines just north of the tank....most are vapor lines to and from...
Kurt L71S
______________________________
Attachments
Lemans71sport
New member
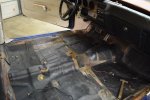
Worked today on completing the cleaning of the underside of the 71. I also removed all the body bushings and only had two that broke off...the two under the interior. I removed all the interior and used a cutoff saw to open the two locations..I have them soaking in Mr. Blaster. I have some other tasks for Owen Machine and Welding. We'll catch all this in one trip.
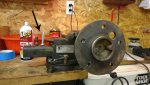
Went to NAPA today and picked up all the bearings, seals and U-Joints for the car. Now have the Pinion Seal installed and will be working on getting the Axle Bearings and Seals installed...Then it's time to paint and install the new 4 Wheel Disc Conversion...
Kurt L71S
Went to NAPA today and picked up all the bearings, seals and U-Joints for the car. Now have the Pinion Seal installed and will be working on getting the Axle Bearings and Seals installed...Then it's time to paint and install the new 4 Wheel Disc Conversion...
Kurt L71S
Attachments
Lemans71sport
New member
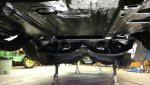
Paint time today...Made a trip to Monticello, In to get some paint, and a lot of other things I thought I needed. Also stopped at NAPA and picked up my axles with the new bearings, seals installed! Thanks Shawn Mitchell for your help! Should just about have the undercarriage painted and ready for the new body bushings...Then things should pick up some....fuel tank, lines, brake system, lines...Things are coming together now....
Kurt L71S
Kurt L71S
Attachments

Lemans71sport
New member
More of the same....
Must be thinking about new wheels....AR Torque Thrust D..longer lugs....
GM made it easy to figure the ratio...do the math...
Kurt L71S
Must be thinking about new wheels....AR Torque Thrust D..longer lugs....
GM made it easy to figure the ratio...do the math...
Kurt L71S
______________________________
Attachments
Lemans71sport
New member
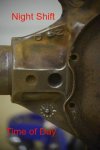
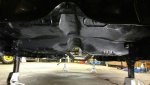
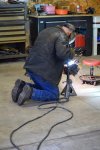
love the mask picture
are you going to do something about that gear ratio? It basically will kill any engine modification you make.
I don't think so. I want a cruiser. 278 is nothing I'm used to but will be nice for taking on the road...Want some giddy up..Take the 68 Camaro!
Lemans71sport
New member
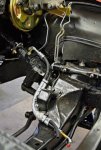
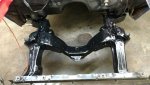
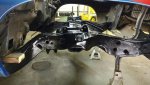
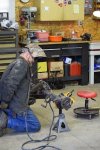
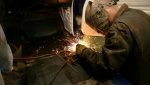
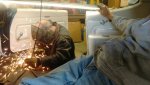
What a day we had in the garage yesterday. I mocked up the rear end with the brake lines and axles. Scott Robertson from Owens Machine and Welding came over for a couple of hours to do his "magic" on the 71...welded the tabs on the rear end, repaired 4 or 5 bolt locations, and welded up the two spots in the interior where I had to cut open the floor boards for broken body mount bolts. God, I love this guy and his family...His Grandpa Mel Robertson and my Dad Earl Keller were such good friends. Mel was a fixture in the community.....miss them both so much!!...
Kurt L71S
Kurt L71S
Attachments
Lemans71sport
New member
More from yesterday's work!!...
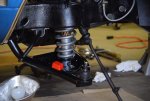
...But somebody HAS to hold the light!! That's my job!!
Mocking up the rear end for the disc brake conversion....It came to a screeching halt...the new rotors would not fit over the axles....Rotors 6 1/8 in...Axles 6 1/4 in....NAPA....Here I come this morning....
Kurt L71S
...But somebody HAS to hold the light!! That's my job!!
Mocking up the rear end for the disc brake conversion....It came to a screeching halt...the new rotors would not fit over the axles....Rotors 6 1/8 in...Axles 6 1/4 in....NAPA....Here I come this morning....
Kurt L71S
Attachments
-
This site uses cookies to help personalise content, tailor your experience and to keep you logged in if you register.
By continuing to use this site, you are consenting to our use of cookies.